
Monday, October 31, 2011
HALLOWEEN
Sunday, October 30, 2011
Cookies


Saturday, October 29, 2011
THE GAME CUPCAKES
I was very excited to be able to make some cupcakes for the rapper The Game a few days ago. In honor of his newly released R.E.D Album I made silky R.E.D Velvet cupcakes with creamy Cream Cheese Frosting and a edible picture of the cover of the R.E.D album. If you take a look on Game Facebook Page it looks like he enjoyed them. http://www.facebook.com/#!/thegame
Check out the photos below. If your interested in ordering THE GAME'S R.E.D ALBUM cupcakes you can email us at 1226cmc@gmail.com or visit our website www.1226events.com. HAPPY PLANNING


Check out the photos below. If your interested in ordering THE GAME'S R.E.D ALBUM cupcakes you can email us at 1226cmc@gmail.com or visit our website www.1226events.com. HAPPY PLANNING


Friday, October 28, 2011
Cupcakes
 |
| Lemon Cupcake with Gummy Bear Frosting With Green Glitter & Gummy Bear |
 |
| Close Up |
 |
| Red Velvet with Cream Cheese Frosting & Walnut & Gold Glitter |
 |
| Up Close |
 |
| Chocolate & Coffee Cake and Raspberry Cream Cheese Frosting topped with a tossed Almond |
 | |
| Up Close |
1st Pumpkin Carving
Last night I went to go carve pumpkins with my Nephew JOJO. I love him to death and I love how he wouldn't let anyone else carve his pumpkins but me. LOL Here is a few pictures from last night but I will be having the main pumpkin carving party tomorrow night. Here is a quick tip when carving your pumpkin get a vegetable peeler and peel the inside of the pumpkin so that it is easier to carve. Check out the pumpkins and check in Sunday for more pumpkins. For more tips and all event needs visit our website www.1226events.com
 |
| Left a ghost coming out the coffin and the right a scary face |
 |
| Jojo holding his pumpkin |
Tuesday, October 25, 2011
Halloween Pancakes

Thursday, October 20, 2011
Treat or Treat
Halloween Post #6: This is a fun simple and inexpensive way for your kids to go trick or treating this year. This project will take literally 2 minutes to make and cost $2. For all your event needs visit our website www.1226events.com HAPPY PLANNING
Here is what you need:
1 Halloween Pumpkin Bucket
1 Glow in the Dark Stick
Glue Gun
1. Plug in the glue gun:
2. Take the glow in the dark stick out the package and snap it so that it starts glowing. (Two come in the package you can use both of them of just one. I only used the one) and make the circle.
3. Put one two dots of glue at the top of the Pumpkin one on the front and one in the back
4. Place Glow circle on top of the 2 dots of glue and let cool for 15 seconds.
Here is what you need:
1 Halloween Pumpkin Bucket
1 Glow in the Dark Stick
Glue Gun
 |
| Glue Gun |
1. Plug in the glue gun:
 | ||||
| Glow in the Dark Stick |
 |
| Pumpkin |
4. Place Glow circle on top of the 2 dots of glue and let cool for 15 seconds.
 | |
| Now you can see the kids as they glow in the dark Treat Or Treating |
Wednesday, October 19, 2011
POTATO BATS
Halloween Post #5: Today I made some potato bats as my side to my hamburgers. This was pretty simple and easy to make. Invest in Halloween Cookie Cutters in different shapes and sizes because they can be used for many things and not just cookies. My nephew went crazy for these potatoes and he is the hardest person to get to eat. So if you do have some picky eater this actually might help you out. For all you event needs event my website www.1226events.com If you need assistant with your party coming up we deliver right to your house with a min. order of $75 Happy Planning and we hope to meet you all soon as we assist with your event.
Here is a list of things you will need for your Potato Bats: (Depending on how many people you have I used 2 potato per person)
6 Potatoes
Oil
Salt & Pepper
Bat Cookie Cutter
A Few Black Sesame Seeds (these I just used for eyes if you don't have them don't worry about it)
1. Rinse off the potatoes, put them in the pot that you are going to boil them in (make sure you have enough room in the pot to let your water boil) and add water to the pot until the potatoes are completely submerged in the water. Put the pot on the stove add a teaspoon of salt and turn on high heat.
2. After about 15 minutes into the boil check your potatoes to see if the skins are cracking and tender when you poke it with a fork. When the potatoes are tender and cracking drain the water from the potatoes and run cool water over the potatoes. This will stop the cooking process and will cool down the potatoes so you can peel them easier.
3. Now peel each potato and completely remove the skin from the potato. Once they are all peeled set aside.
4. Now preheat oven to 400 degrees.
5. Take each potato and cut in in half
6. Now take the Bat Cookie Cutter and go through each potato. Once you have have the Bat Potato use the extra potato strips and make regular fries.
7. Place the Bats and other potatoes in a pan for baking sprinkle salt pepper and drizzle some vegetable oil over the potatoes and place in the oven for about 20 minutes. Once the potatoes start turning a golden brown pull them out the oven. Transfer to a plate, add 2 black sesame seeds as eyes to each bat and serve. HAPPY PLANNING
Here is a list of things you will need for your Potato Bats: (Depending on how many people you have I used 2 potato per person)
6 Potatoes
Oil
Salt & Pepper
Bat Cookie Cutter
A Few Black Sesame Seeds (these I just used for eyes if you don't have them don't worry about it)
1. Rinse off the potatoes, put them in the pot that you are going to boil them in (make sure you have enough room in the pot to let your water boil) and add water to the pot until the potatoes are completely submerged in the water. Put the pot on the stove add a teaspoon of salt and turn on high heat.
2. After about 15 minutes into the boil check your potatoes to see if the skins are cracking and tender when you poke it with a fork. When the potatoes are tender and cracking drain the water from the potatoes and run cool water over the potatoes. This will stop the cooking process and will cool down the potatoes so you can peel them easier.
3. Now peel each potato and completely remove the skin from the potato. Once they are all peeled set aside.
4. Now preheat oven to 400 degrees.
 |
| Boiled Peeled Potato |
 |
| Cutting Potato in Half |
6. Now take the Bat Cookie Cutter and go through each potato. Once you have have the Bat Potato use the extra potato strips and make regular fries.
 | ||||
| Cutting the potato |
7. Place the Bats and other potatoes in a pan for baking sprinkle salt pepper and drizzle some vegetable oil over the potatoes and place in the oven for about 20 minutes. Once the potatoes start turning a golden brown pull them out the oven. Transfer to a plate, add 2 black sesame seeds as eyes to each bat and serve. HAPPY PLANNING
 |
| Ready to eat Potato Bats |
Tuesday, October 18, 2011
Ghostly Grill Cheese
Halloween Post #4: This is my Favorite so far. Ghostly Grilled Cheese Sandwiches. This is great for lunch with the kids or even dinner with some Tomato Soup (Or I would call it Bloody Dipping Swamp Soup). This was fun because it literally took 15 Minutes to make and fun to eat. For more fun event ideas and to place an order visit our website. www.1226events.com. We are taking out last orders for Halloween Events by Friday So order full service or just a few things. We also will deliver to your door step with a min. order of $75 or more. Hope to speak with you soon!
Here is what you need for the Ghostly Grilled Cheese Sandwiches:
Ghost Cookie Cutters (Or any Halloween Shape)
Bread
Pesto sauce AKA: Swamp Sauce (You can mix the Pesto with some Butter to make a Pesto Butter or use it just like that)
White Cheese, Any white cheese you want I used a cheese that has a nutty flavor to go with the pesto Sauce (I used about 3 Table Spoons of Cheese)
Black Sesame Seeds (I used these as eyes but you can use flax seeds or just go without eyes)
1. Preheat Over to 350 Degrees but I Just used my toasted Oven
2. Cut the Bread in Half Long Ways
3. Spread Pesto AKA Swap Sauce on one side of the bread if you want to spread on both sides you can.
4. Slice Cheese to put on the side with the Pesto Sauce
5. Get your Ghost Cookie Cutter and cut out your ghost shape on the top side of the bread and take out the ghost shape. (Put the ghost cut out a side)
6. Now put the sandwich in the toaster oven or the regular oven (Put the 2 pieces of bread in separately do not put them on top off each other yet). It takes about 5-7 minutes you want the cheese to melt and do not burn the bread.
7. Once you pull out the sandwich put the bread on top and add the sesame seeds for eyes and serve. I service this with chips but if you like you can serve with Bloody Tomato Soup.
HAPPY PLANING
Here is what you need for the Ghostly Grilled Cheese Sandwiches:
Ghost Cookie Cutters (Or any Halloween Shape)
Bread
Pesto sauce AKA: Swamp Sauce (You can mix the Pesto with some Butter to make a Pesto Butter or use it just like that)
White Cheese, Any white cheese you want I used a cheese that has a nutty flavor to go with the pesto Sauce (I used about 3 Table Spoons of Cheese)
Black Sesame Seeds (I used these as eyes but you can use flax seeds or just go without eyes)
1. Preheat Over to 350 Degrees but I Just used my toasted Oven
 | |||
| Bread Cut in Half |
 | ||
| Swamp Sauce |
4. Slice Cheese to put on the side with the Pesto Sauce
5. Get your Ghost Cookie Cutter and cut out your ghost shape on the top side of the bread and take out the ghost shape. (Put the ghost cut out a side)
 | |
| Top of Sandwich |
 | ||||
| Ghost cut out that you can use for Bruchetta or small open faced sandwich |
6. Now put the sandwich in the toaster oven or the regular oven (Put the 2 pieces of bread in separately do not put them on top off each other yet). It takes about 5-7 minutes you want the cheese to melt and do not burn the bread.
7. Once you pull out the sandwich put the bread on top and add the sesame seeds for eyes and serve. I service this with chips but if you like you can serve with Bloody Tomato Soup.
HAPPY PLANING
 |
| Ghostly Grilled Cheese |
Monday, October 17, 2011
CONGRATULATIONS ALIDA & KRIS
Congratulations to Alida & Kris they tied the knot this past Saturday and everything was perfection she looked wonderful in her dress and everything from the cake to the flowers was very tasteful. here are some pictures of the wedding. For all your event needs please visit my website www.1226events.com
 |
| Ceremony |
 |
| Just Married |
 |
| Hanson's Cake |
 |
| One of two center pieces |
 |
| 2nd Center Piece |
 |
| Walking into the Reception |
 |
| 1st Dance |
 |
| Me, Mother of the Bride, Margret (Sister), Zouphie (My Mom) |
HALLOWEEN SNACK
Halloween Post #3: My favorite snack of all time is almond butter or peanut butter and applies. So today I have put together a fun Halloween way to make this snack. Your kids and you can have fun making these creepy crawlers and it's a healthy snack before all that candy at the end of the month. For more information please visit my website and if your interested in ordering fun treats or you need help putting together a party let us know. www.1226events.com
Here is what you will need:
One Apple per person
Peanut Butter or Almond Butter (About 2 tablespoons per Apple)
Almond slices
Cup the apple in half (I used a zigzag knife but you can use a regular knife and cut in zig zags) core out the seeds and core and fill with peanut butter and add sliced almonds to make teeth.
You can also put some caramel on the side for dipping or even the chocolate blood sauce from the fingers we made Saturday. Hope you guys enjoy
 | |
| Two apples |
 | |
| Peanut Butter |
 |
| Sliced Almonds |
 |
| Zig Zag Knife |
 |
| Creepy Crawler Snac |
Sunday, October 16, 2011
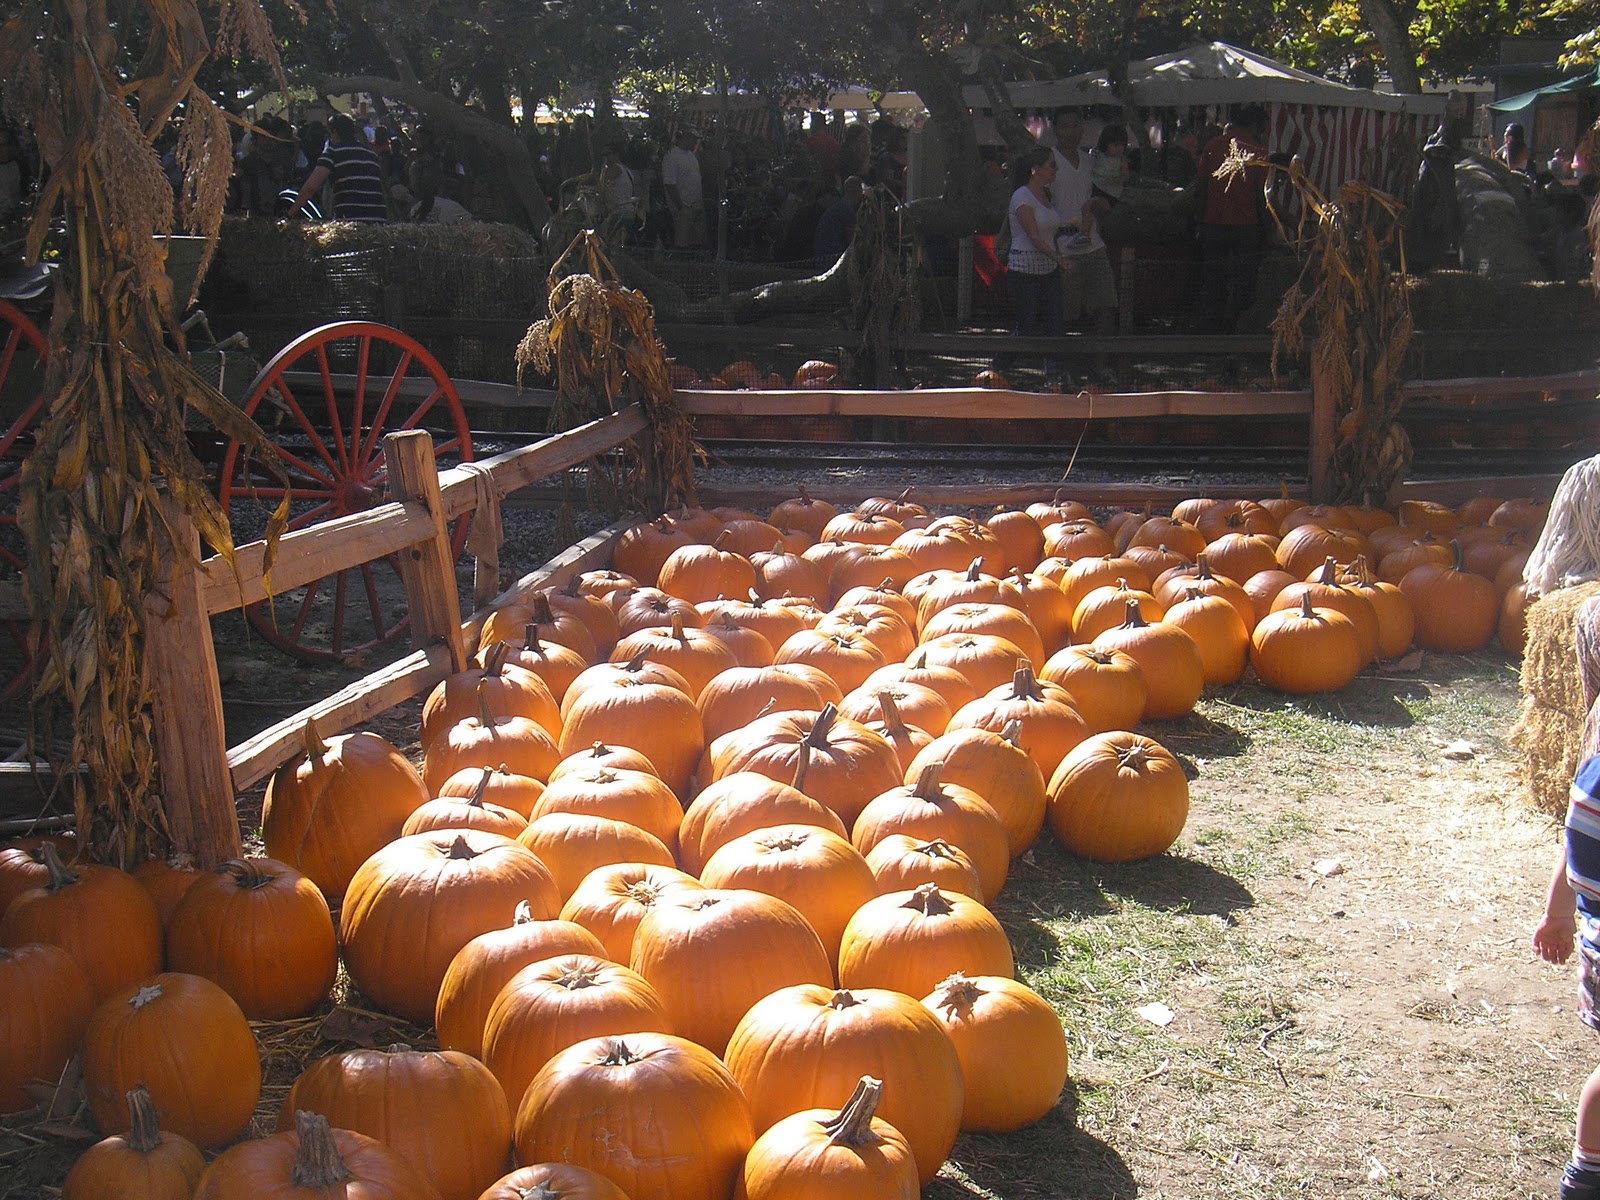
Pumpkin Patch
Hey everyone Halloween Post #2: I love love love Halloween because it is the start of the holidays and I love the holiday season. Halloween is great because it does not need to be perfect anything goes the uglier & grosser the better. LOL
Today is Pumpkin Patch day we went to the pumpkin patch to have some fun and pick out some pumpkins that we will carve a couple of days before Halloween so here are some photos of the pumpkin patch today.


 To get some more ideas about Halloween tune in everyday for Halloween fun. So excited!!!! Go to my website if you want some more idea or want us to put together a Halloween treat or party for you. www.1226events.com
Today is Pumpkin Patch day we went to the pumpkin patch to have some fun and pick out some pumpkins that we will carve a couple of days before Halloween so here are some photos of the pumpkin patch today.


Saturday, October 15, 2011
HALLOWEEN SPOOKY LADY FINGER COOKIES AND CHOCOLATE BLOOD DIPPING SAUCE
Halloween post #1: I made Martha Stewart's Ladies Finger Cookies and my own recipe for the chocolate blood dipping sauce. I loved the way the cookies turned out because they were very spooky and neat to look at and I know if you have these at your party they will be a hit. Here is what I did not like about the recipe it took 2 hours to make and the taste was very OFF. It just did not taste very good. So if I make these again I will use my own recipe for the cookies. If you want a short cut I would just use a ready made sugar cookie package that you would get at the store and shape them into fingers and add the almonds.
If you like what you see and don't have time to make these creepy fingers log on to my website and call and place an order if you order $75 worth of goodies we will deliver for FREE. www.1226events.com
Here is the step by step on how to make these goodies:

If you like what you see and don't have time to make these creepy fingers log on to my website and call and place an order if you order $75 worth of goodies we will deliver for FREE. www.1226events.com
Here is the step by step on how to make these goodies:
 |
| Almonds in the water |
- 2 tablespoons red food coloring
- 30 blanched almonds
- 2 large eggs
- 1/4 teaspoon pure vanilla extract
- 8 tablespoons unsalted butter (1 stick), room temperature
- 1/2 cup powdered sugar
- 5 tablespoons granulated sugar
- Pinch of salt
- 1 2/3 cups all-purpose flour
- 1 tablespoon Greek yogurt
Put your almonds in a bowl that can handle heat
and set aside. In a sauce pan bowl about 1 cup water and once it comes to a bowl pour over the almonds making sure the almonds are submerged completely into the water. Let these sit in the water until you are done with the dough the longer they stay in the water the easier the skin comes off the almond.
 |
| Egg and Vanilla Whisked together |
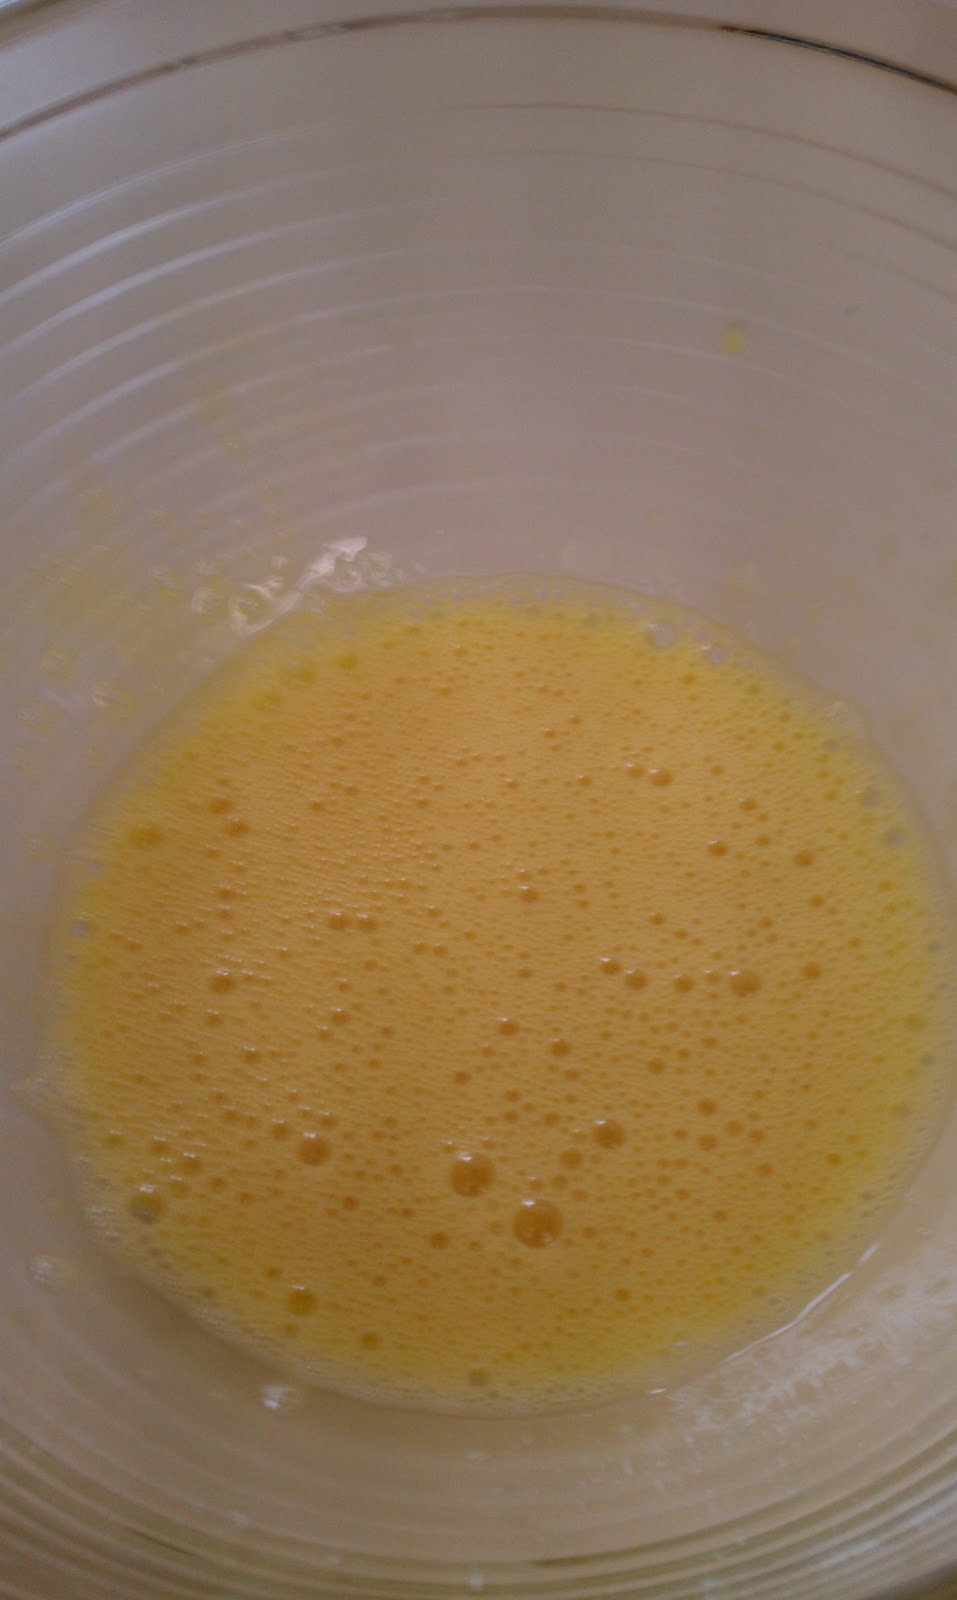
2. Separate one of the eggs put the white part of the egg in a small plate (You will use that later to brush the cookies) Take the egg yolk the 2nd egg and vanilla and whisk together so that it is well combined you should have a few small bubbles after whisking it together and set that aside for now.
 | |
| Butter and sugar |
3. In another bowl combine butter, Powdered Sugar, Sugar & salt. Mix until well combined. Should look like a crumble
 | |||
| Combine well |
4. Add the egg mixture to the butter and sugar and add the tablespoon of yogurt as well at this time.
 | ||
| Final Mixture |
5. Now add the flour into the mixture. I would add 1/2 cup of flour at a time. Make sure it is mixed together and it will look like a soft dough.
 | |
| Wrapped up dough |
6. Now lay out a piece of plastic wrap on the counter and put all the dough on top of the plastic wrap it up real tight and put it on the fridge for 30 minutes. Now preheat the oven to 350 degrees.
 |
| Almonds before draining |
 |
| Almond Peels |
 |
| Peeled almonds |
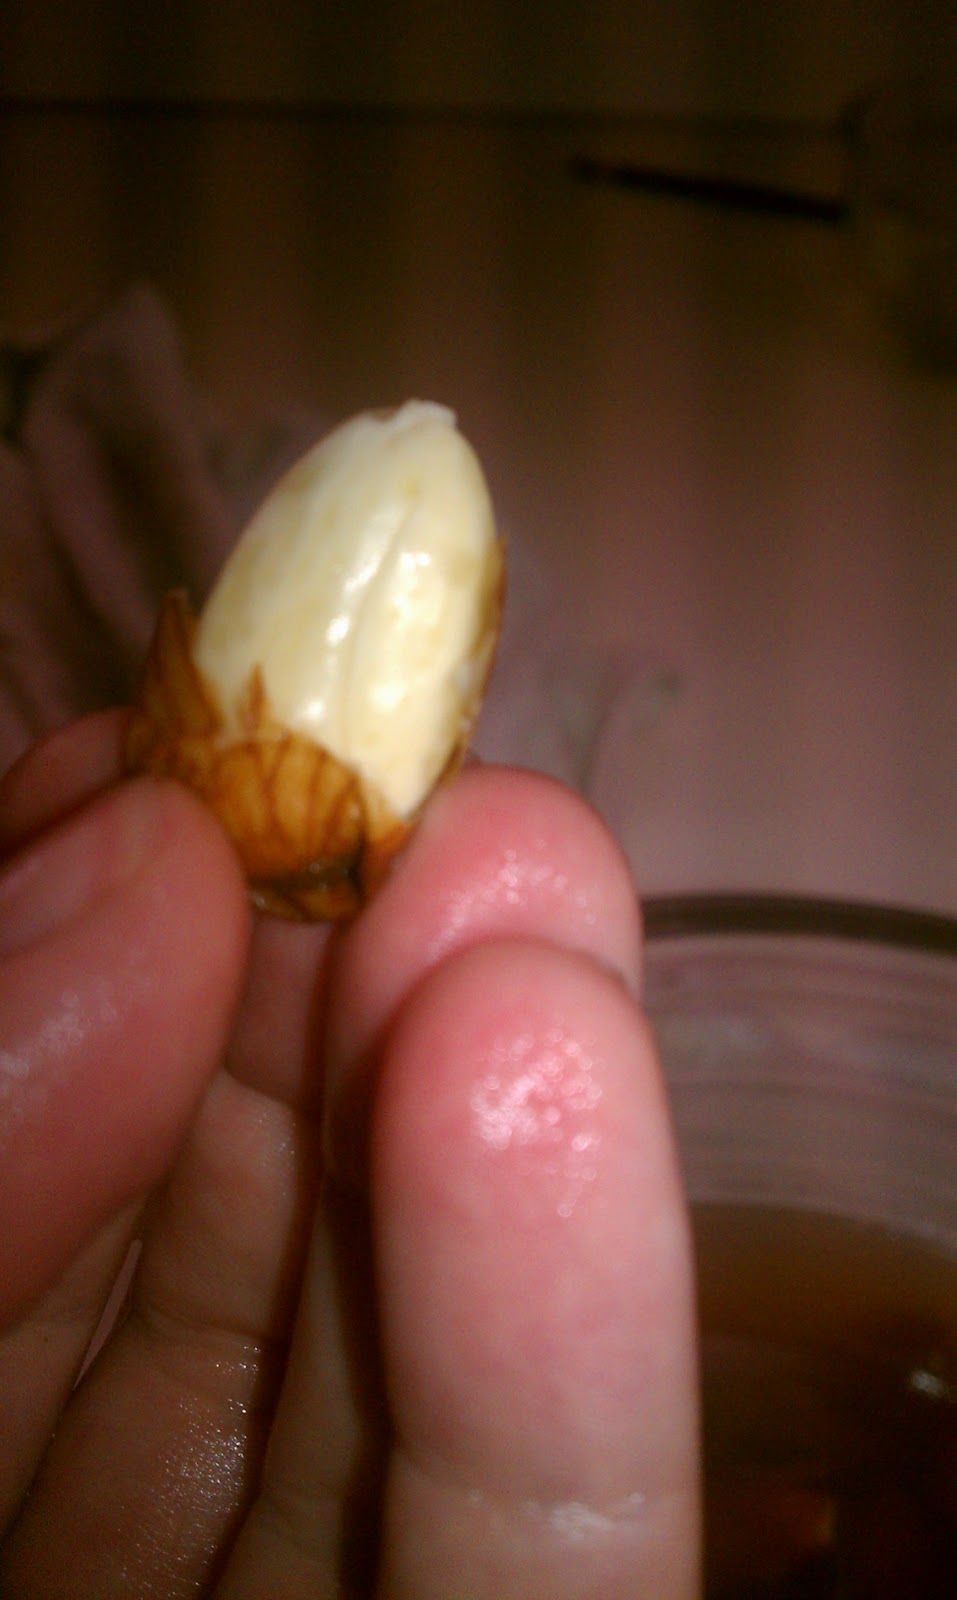
7. While the dough is resting in the fridge you can work on the almonds. The color of the water that the almonds are in should be a brown color at this point. Drain the water from the almonds and start peeling the almonds. The skin should pop right of off at this point. Put the peeled almonds in a separate bowl and throw away the peels.
 |
| Peeling almonds |
 | ||
| Painted Almonds |
8. Now spread the peeled almonds on a plate lined with parchment paper. After the almonds are laded out put a few drops of red food coloring in a small bowl and start painting the almonds the red color. Put the almonds aside for now.
 |
| About the press out the dough |
 |
| Cut the dough into strips |
 |
| Rolled out on the tray |
9. On a clean counter throw some flour on the counter and remove the dough from the fridge. Unwrap the dough from the plastic wrap and cut in half. Put one half of the dough back in the wrap and put the other half on the counter on top of the flour. Working with the dough that is on the counter start pressing it out and cut in strips. (if the dough is sticking to the counter just add more flour to the counter to keep it from sticking) Now take each of the strips and start rolling them into finger shapes (remember these do not have to look perfect they are for Halloween) After they are the shape you like put them on a cookie sheet lined with parchment paper. Do the same thing with all the dough
 |
| Ready for the oven |
10. Now take fingers on the tray and start putting the almonds "nails" on the front of the cookie to resemble fingers. Then start adding some lines with a butter knife to resemble the knuckles and line on a finger. After all the cookies have nails and lines on them get a brush and brush the egg white over the cookies and put in the oven. It should take about 12-15 minutes to bake. You want a nice golden brown.
11. After the cookies are a nice golden brown remove from the oven and let cool completely.
Blood Chocolate Sauce
- 1/2 cup of heavy cream
- 1/2 cup of white chocolate or red chocolate
- 1 tablespoon butter
- 2 drops of red food coloring (only add this to the white chocolate if you don't have red chocolate)
 |
| Ready to serve |
2. In a bowl that can handle heat add the chocolate (I used red chocolate if you are using white chocolate add the red food coloring) Add the hot cream over the chocolate and stir until well combined and after the chocolate is completely melted add the butter whisk until butter dissolves and set aside to cool and serve.

FINISHED PRODUCT Dip the fingers into the chocolate blood sauce makes a great combination. HAPPY HALLOWEEN.
Subscribe to:
Posts (Atom)